6. Sequence Menu
In this menu, users perform various operations with parameterized ‘sequence’ files that describe basic motion/tool paths.
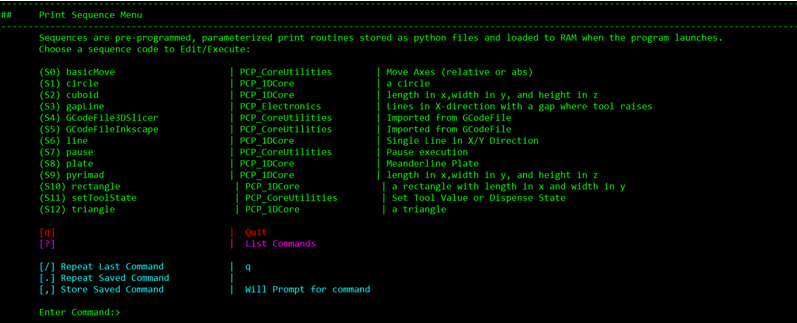
Each sequence shown in the menu (labeled S#) corresponds to an individual python file that gives the ‘blueprint’ for the sequence. For example, entering “S6” opens the “Line” submenu as shown below:
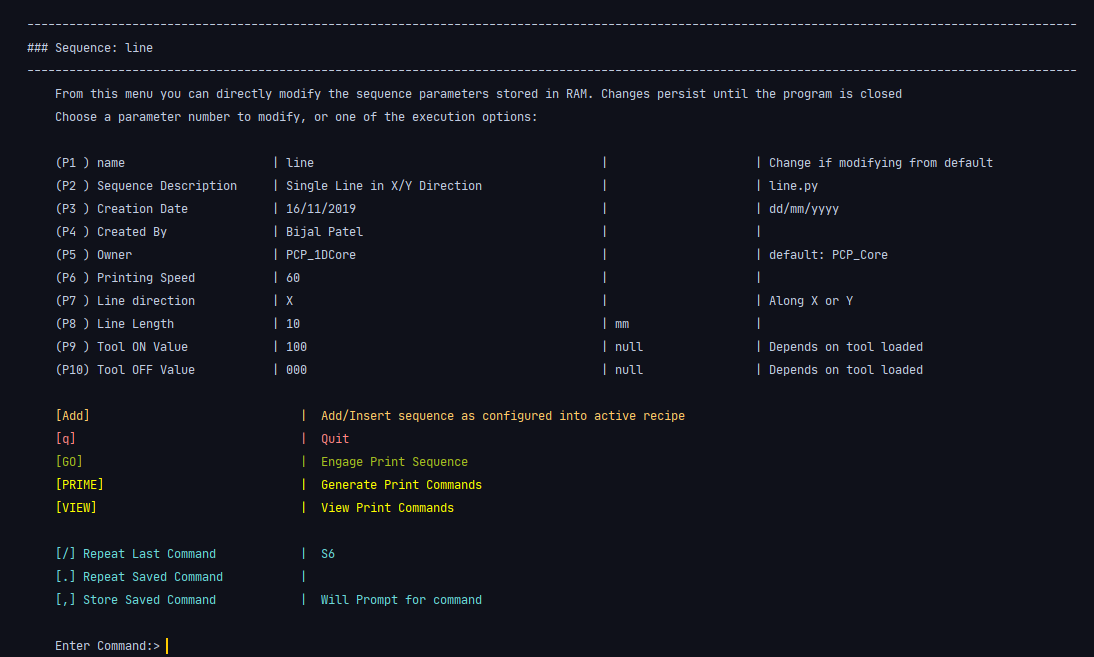
From this submenu, the parameters of the sequence can be modified. These include basic notetaking parameters, such as the creation date of the sequence, description, name etc. and actual geometric/ execution parameters such as the printing speed, length, and tool on/off values.
After the sequence parameters have been finalized, the bracketed commands at the bottom can be used.
- ADD inserts the sequence into the active recipe at a given index
- PRIME generates the python commands that will be executed when the sequence is run and stores them in RAM
- VIEW displays the python commands in the terminal for user inspection
- GO begins execution of the program
- q quits the menu and returns to the main menu
6.1. The Sequence Library
Users can create and add sequences by cloning the python files in the polychemprint3/sequence folder and modifying parameters. By default, releases of polychemprint3 contain the following sequences built-in:
6.2. Importing GCode Sequences
PCP3 can natively import GCode generated by external slicer programs through specific GcodeFile sequences. For 2D (single layer) patterns, it is often easier to generate GCode from a vector image in the free software InkScape. For 3D (multilayer) patterns, Cura and slic3r are good options for converting .STL CAD files to Gcode. In both cases, it is very important to choose slicing settings that will ‘play nice’ with PCP3. For further details and tutorials, see the specific sequence pages below.