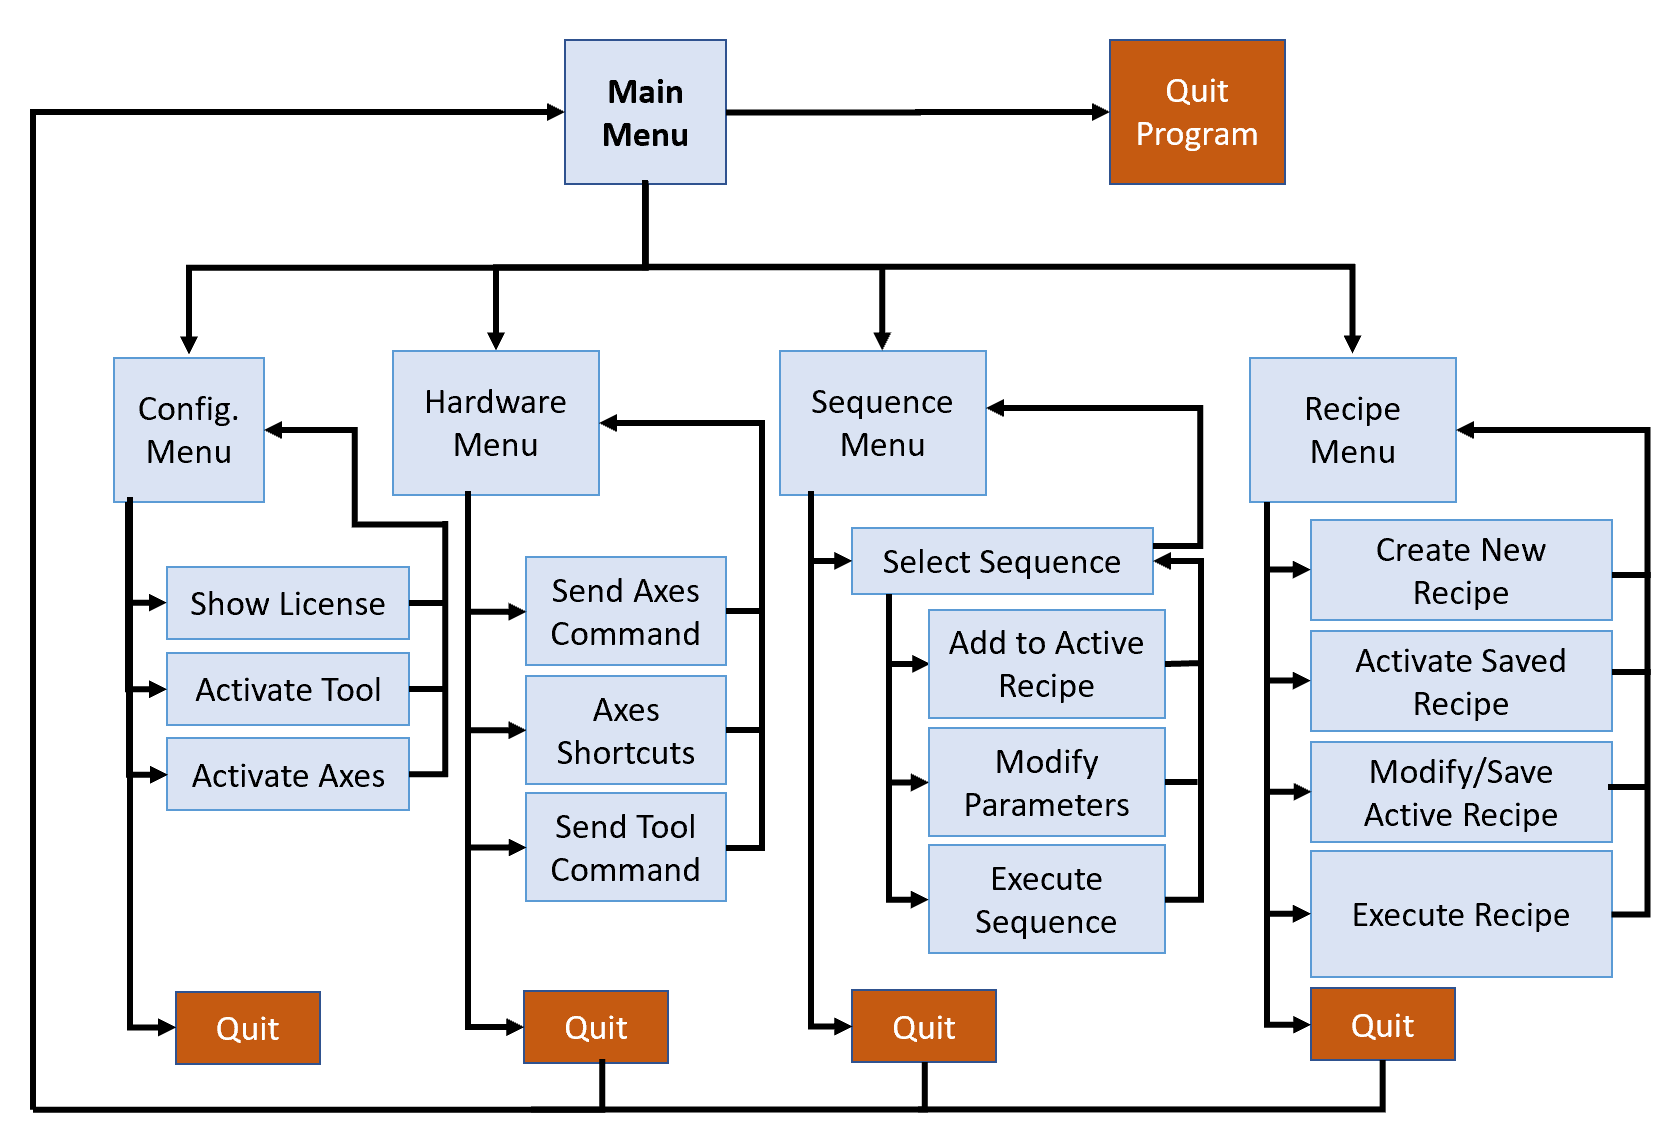
3. Main Menu and Navigation
PCP3 has a (hopefully) straightforward command-line interface (CLI) based on a series of menus and submenus. The Main Menu is the ‘root’ of the decision tree, from here you can navigate between the main functions of the program: configuration, manual control, sequences, and recipes. It should appear after the initial loading sequence and is a good place to start learning how to navigate the CLI.
3.1. Reading Menus
Here is a screenshot of the main menu in version 3.0:
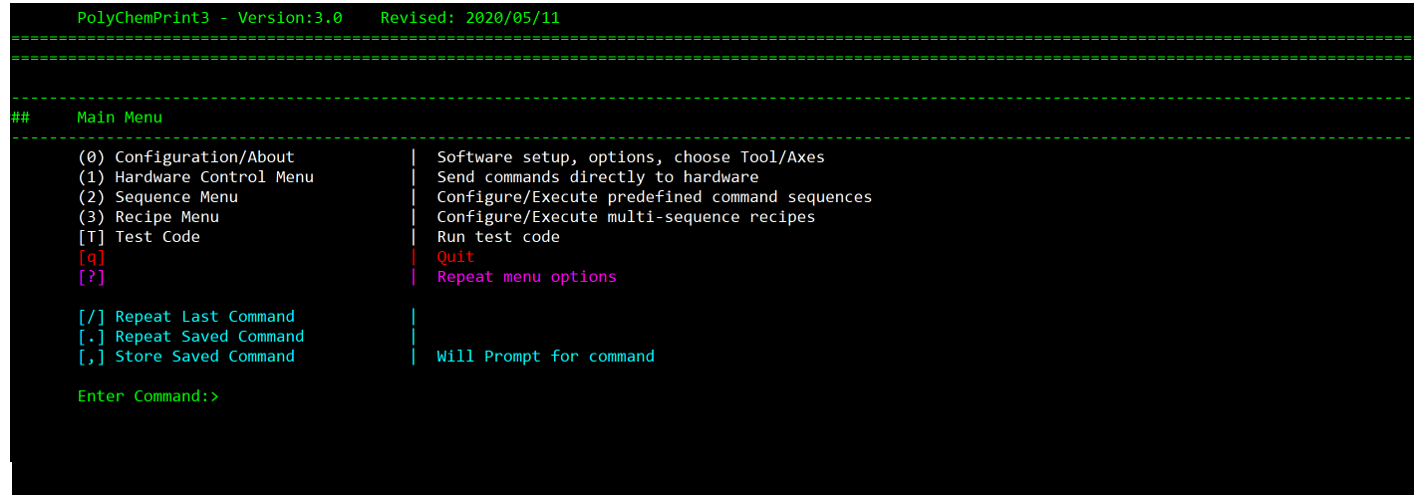
As you can see, there are 2 columns separated by a vertical bar (“|”). On the left, is a command string (enclosed in brackets “[]” or parentheses “()”) and short name for the command. At right, there is an optional detailed description. For some commands, such as those near the end of the list (in teal) (“/”, “.”), the text on the right is initially blank and will be filled in based on the saved command in memory.
This scheme repeats throughout: in order to execute a command or change a data value, enter the command string at the extreme left (in brackets or parentheses).
At the bottom of the screen is the prompt.
3.2. Navigating Menus
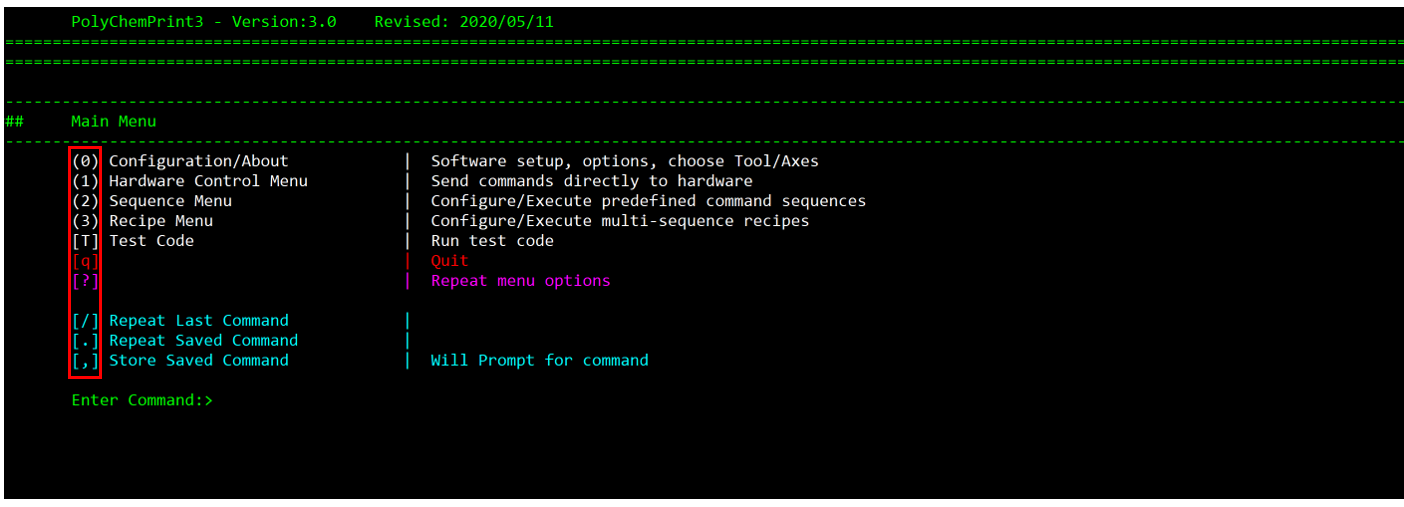
As mentioned above, the leftmost columnn [boxed in red] contains the command strings. Type in 0 gives users access to Configuration/About Menu. Type in 1 gives you access to Hardware Control Menu. Type in 2 to go to Sequence Menu. Type in 3 to gain access to Recipe Menu.
3.3. Special Commands
Type in “T” to perform a test code run. This executes whatever code is in the io_TestCode() subroutine of the __main__.py file. By default the subroutine is left empty, but I found it handy when developing the code, so I left it in as an option to aid user testing.
Type “?” to repeat the current menu. Essentially it is just a handy refresh in case the screen gets cluttered with text. In this case, a new Main Menu will appear.
The “/” command works repeats the last command entered. This is mostly useful just when doing manual hardware control. In some menus this leads to meaningless behavior and so is disabled. For example, if the previous command typed in the terminal is “G0 X5”, typing “/” will send “G0 X5” to the printer again.
The “.” command will repeat the command that is save in Stored Saved Command.
The “,” command lets users save a command, so user can just type . to perform a long command instead of typing the long command every time. Again, a handy shortcut mostly for manual hardware control.
3.4. Quit the Program
In the main menu, “q” lets users quit the program. This triggers a confirmation prompt as follows:
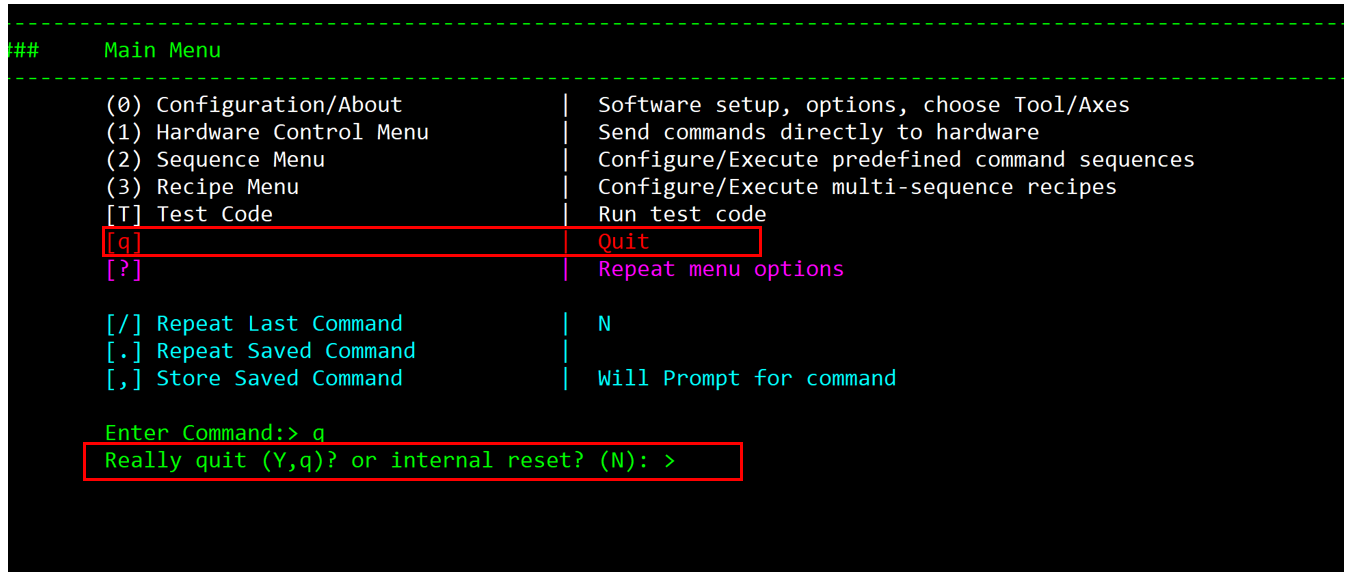
Now, type “Y” or “q” will let users exist out of the program and returning to the terminal. (Note: In general, input to polychemprint3 is not case sensitive, unless being sent directly to hardware) Typing N will reset the program, which means restarting the program. Any work (recipes) that are not saved will be lost.
3.5. Ctrl + C, or Break
As of version 3.0, users can use the key combination “Ctrl + C” to shortcircuit ongoing processes and return to the last menu. This is invaluable for cases where you start a print sequence (with thousands of lines) and realize that you need to cancel out early. Note: THIS WILL NOT automatically turn off toolheads or suspend the current GCode command that is sent, it just prevents the PC from sending further commands. So be vigilent! The hardware off switch is still the last best fail-safe.